Friday, April 15, 2016

Paper Tube Beads Decorating Area

There are many ways to decorate your Paper Tube beads before rolling them . But first I will go thru some points you should know about where and what parts of your paper strips  need to be decorated .

IBDCraftyLady Paper Tube Beads
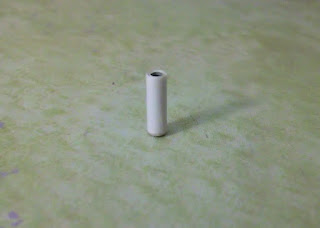
Here is my paper bead display showing samples of all the paper tube beads I like to use. As you can see there are many different sizes and I think about this when designing my paper tube beads. It also helps me when designing a set of paper tube beads that I want to work together. Deciding on how they will be colored to work with each other, and what sizes I will need to complete the set of paper beads.


IBDCraftyLady Paper Tube Beads
When you are decorating your paper tube beads you must primarily decorate a certain area on the top of your paper strips with the main design you want on your paper bead. These measurements come in very handy when designing your paper tube beads so that your finished paper tube beads all come out looking the same. The width of your paper tube bead does not have an effect when designing. Just the length of your paper strip does, as it must fit all the way around your finished paper tube bead.


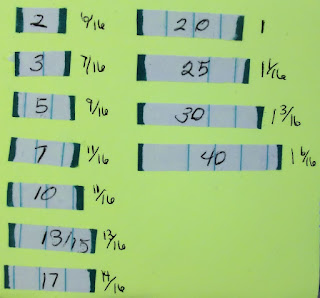
Paper length                       Design area
2 inches                                               6/16  of an inch
3inches                                                7/16 of an inch
5 inches                                               9/16 of an inch
7 inches                                               11/16 of a inch
10 inches                                             11/16 of an inch
13 inches                                             13/16 of an inch
15 inches                                             13/16 of an inch
17 inches                                             14/16 of an inch
20 inches                                             1 inch
25 inches                                             1 1/16 of an inch
30 inches                                             1 3/16 of an inch
40 inches                                             1 6/16 of an inch

IBDCraftyLady Paper  Bead Tip


IBDCraftyLady

Monday, April 11, 2016

Paper Beads (Tube Beads)

Paper tube beads one of my favorite paper beads to create as there are so many ways to decorate them.  You can never go wrong with  paper tube beads especially when you want to make a collection of beads that will all work together in a jewelry piece. Creating  and using the same colors and patterns on a lot of different sized paper tube beads.

IBDCraftyLady Paper Tube Beads

What you will need
Paper bead roller - If you do not have one here is a DIY to make your own.
Bead hole maker - If you do not have one here is a DIY to make your own.
White glue
Paper
Scissors or paper cutter
Decorating Supplies - These will vary depending on how you choose to decorate your paper beads. 


IBDCraftyLady Paper Tube Beads tools

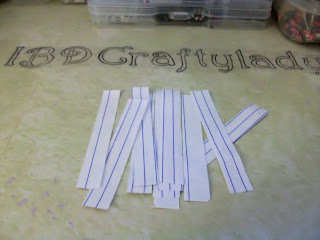
To start making your paper tube beads you will need to cut long rectangular pieces of paper.
See the chart below for the different paper measurements that you will need to cut in order to get the size of paper tube bead that you want to make. This chart represents the sizes the beads will be  if they have been made with the paper from spiral notebooks. If a thinner type of paper is used your paper beads will be smaller in width, and if you use a thicker or heavier paper your paper beads will have a larger width.

IBDCraftyLady Paper Tube Beads Chart

Once you have all of the paper strips cut, you will now have to decide how you are going to decorate these paper beads as some types of decorating needs to be done before you roll your paper beads.


IBDCraftyLady Paper  Beads Tip 1

IBDCraftyLady Paper Tube BeadsIBDCraftyLady Paper Tube Beads

To prepare the inside bottoms of your papers before you roll them. You will want to paint or color the bottom 1/2 inch of the paper so that when the bead is rolled it does not show the white paper in the hole of your bead.This will give it a nice added finish to your paper beads.

IBDCraftyLady Paper Tube Beads

This picture shows you the difference in the appearance of your paper beads if you do not color that bottom 1/2 inch of each paper strip before rolling your paper beads.

IBDCraftyLady Paper Tube Beads


For the purpose of showing you all of the steps to actually form the Paper Tube Beads I will be making  silver paper bead blanks.  So let's get started!

IBDCraftyLady Paper Tube Beads
 Cut your strips of paper to the size you want to make these are 1/2 inch by 3 inches.

IBDCraftyLady Paper Tube Beads
Prepare the bottoms of all your paper strips. If your paper is white and you are making white paper bead blanks you can skip this step.

IBDCraftyLady Paper Tube Beads
Place your paper strip into your bead roller with the colored end facing you.

IBDCraftyLady Paper Tube Beads
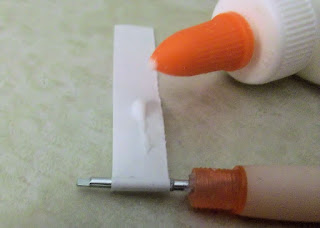
Once you have rolled the colored part of your paper add a light coating of glue all over the remaining part of the paper. I prefer to glue all of the paper instead of just the ends this makes the bead stronger and you do not end up having it unravel on you .

IBDCraftyLady Paper Tube Beads
Keep the paper strip aligned as you roll it to make a nice even bead.

IBDCraftyLady Paper Tube Beads
Then you have finished making the paper bead,  hold the bead in place on the roller and give it a little twist in the opposite direction that you had rolled it this will loosen up the piece of the paper that was place in the bead roller making it release off the roller easier.

IBDCraftyLady Paper Tube Beads
Use your bead hole maker, place the bead you just made onto the bead hole maker and roll it across your finger. this will make a clean hole with no extra paper blocking it.

IBDCraftyLady Paper Tube Beads
To make sure both ends are flat stand your paper bead upright an press it down on a flat surface.

IBDCraftyLady Paper Tube Beads
String up your paper beads on to a piece of fishing line.  

IBDCraftyLady Paper Tube Beads
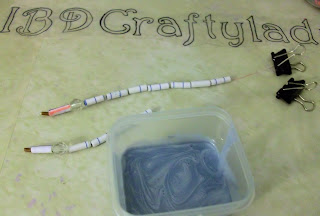
On the end of each piece of fishing line place a few beads these beads will give the glaze a place to settel and it will not ruin your last paper bead that would otherwise be there.

IBDCraftyLady Paper Tube BeadsIBDCraftyLady Paper Tube Beads
Place some glaze into a small container and add some paint to make the glaze the color that you want it. I am using a metallic silver, mix well. I got these great little square containers at the dollar store in a pack of 12. they are the perfect size for me.


IBDCraftyLady Paper Tube Beads
Dip your string of paper beads into the glaze let soak 20+ seconds giving the glaze time to soak in. 

IBDCraftyLady Paper Tube Beads
Let some of the extra glaze drip off this will leave you with less of a mess on your glazing rack.


IBDCraftyLady Paper Tube Beads
Hang your string of paper tube beads to dry.


IBDCraftyLady Paper Tube BeadsIBDCraftyLady Paper Tube Beads

After 4 dips into the silver glaze they are done.

Use your bead hole maker one more time to clear out any excess glaze from the holes.They are now ready to use just like this or you can decorate them further.

During the next few weeks I will be showing you different ways of how to decorate your paper tube beads.

IBDCraftyLady


Friday, April 8, 2016

Paper Bead Blanks

Paper bead blanks  what are they ?
Paper bead blanks is the solution I have come up with so that I could make all the paper beads I wanted to without having to decorate them while creating them.


 Why would I want to make paper bead blanks?
Having paper bead blanks in your beading supplies allows you to have any size bead available to you while you are creating your jewelry pieces. Giving you the opportunity to color or decorate them as needed and to customize them to fit in perfectly with your project.

How do I make Paper Bead Blanks?
Just choose the beads you want to make I like to make 50 of these paper bead blanks at a time. Once you have  all of your paper beads rolled you will get them ready for painting or dipping.  You will now want to mix some paint in with your varnish then dip or paint all your beads and let them dry  this could take up to 3 coats so that you end up with hardened and solid colored paper beads. There you have it Paper bead blanks.

Why am I adding Paint  to the varnish?
The reason you are adding paint to the varnish is so that the varnish will harden the paper bead  creating a good strong bead blank. The paint will color the varnish leaving you with a paper bead  that will have a consistent color covering it. which will make it easier to change it to what you will need later.

What are the best paint colors to use?
The best paint colors to use on your paper bead blanks are the following.
White: white paint will make it so that whatever color you choose to cover the paper bead blank with will give you the true color.

Black: black base paint on your paper bead blanks will give you a darker  shade of the color used.
Gold/Silver/Copper/Bronze: The metallic  paints are great to use  just on the ends of the black and white paper bead blanks to give the that metallic feel to your beads taking away the attention of them having been made with paper.

What color do you use most?
I make all of my paper bead blanks white for me it works best as I do not have a lot of storage space. I also like to make all my own custom colors and with the paper bead blanks being white they  always end up the color I have created. But If I had more storage room I would make all of the paper bead blanks in all of the colors just to save time while making  jewelry.

Do These paper bead blanks have to be stored in any special way?

The paper bead blanks do not need any special type of storage as long as you have let them totally dry before storing. If they are not totally dry you could end up with a bunch of paper beads stuck together. Also there are times when I will make tons of beads but do not glaze them right away , waiting till I have time then do them all at once. If you do this you will want to keep your paper beads in a dry area as moisture could ruin your paper beads before you get a chance to waterproof them. 


Wednesday, April 6, 2016

How I Store and Prepare My Papers.

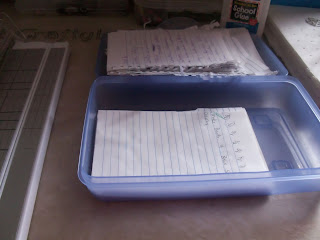
Since I do not have a lot of extra space in my small apartment I have to make sure everything has its own place . That place for my recycle papers that I use to make my paper beads is this plastic bin.

I just love how each papers container fits nicely into each other to help keep this main bin all nice and organized for me. This also helps me to not get to carried away with the amount of paper I store.


In this bin I keep 3 separate containers for my papers of choice. For my Paper beads I prefer to use the pages from spiral note books mainly as I am always making notes on crafty ideas and have tons of these. Every 4-6 months I go threw them all ripping out pages that I no longer need and transferring the ideas I want to keep to a main note books on whatever craft they are for.

The large plastic container is where store old Avon books and other magazines that I no longer have a use for, and old printer paper that is either printed wrong or has served its purpose.


 This smaller container holds pages from all of these smaller types  of spiral notebooks.

The medium wicker basket holds pages from medium spiral notebooks.

When I need more paper to make my paper beads I then pick one of the containers and prepare them  for use in my paper bead creation.


I use this effective little paper cutter to trim off all of the tattered ends caused from ripping them out of the notebooks.

I toss all of theses paper trimmings into a separate container.
Later I will use these paper scraps to make my home made papers.

If you want to make your own handcrafted paper check out these helpful links


When I am all done I end up having a good supply of nicely trimmed papers just waiting on me so that I can make all the paper beads my little heart desires.


Monday, April 4, 2016

Paper Bead Display

IBDCraftLady Paper Bead Display
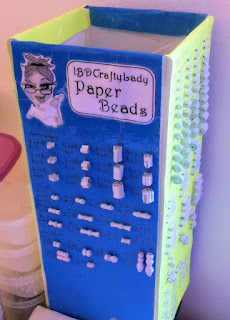
 This paper bead display is what I use to keep track of the paper beads I make most often. This way when I want to make some of a certain type of paper bead all I have to do is find the bead on the display and it will tell me what I will need to duplicate the bead. I use to keep a notebook with all of the instructions to make the paper beads . But I found that seeing the actual bead instead of a drawing of it made it a lot easier to decide what size I would really need. So this was my solution for that I hope you find this  as a useful tool in your paper bead making supplies as I do.

What You Will Need To Create This Project
1 Piece of foam board
6 stick pins
Packing Tape
Exacto Knife
Some poster board or other paper to decorate the sides


IBDCraftLady Paper Bead Display
 Start off by cutting your piece of foam board in half


IBDCraftLady Paper Bead Display
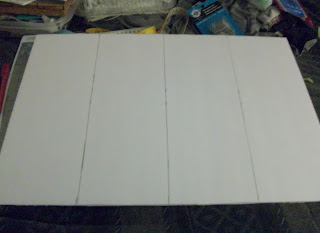
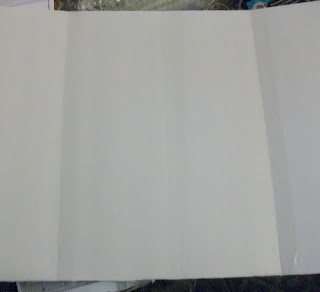
Using one half of this foam board which should now be 20 inches wide by 14 inches in height. You want to draw 3 lines 5 inches apart so that you will  have 4 equal sections. Using the exacto knife score threw only the top layer of the foam board so that the board can be bent but not cut into pieces
.

IBDCraftLady Paper Bead Display
Fold your piece of foam board into a box shape so that you can see the creases on the  opposite side . lay board flat again and now use the packing tape. Place a strip of the packing tape along each crease to strengthen these areas so that they will not tear apart in the future.


IBDCraftLady Paper Bead Display
Now place the foam board back into your square shape and use another piece of packing tape to attach the last 2 end sides together.


IBDCraftLady Paper Bead Display
Cut a small piece of foam board 1.5 inches wide by 5 inches in length. Tape this piece into place as shown above. Creating a brace in the inside bottom of your paper bead display.


IBDCraftLady Paper Bead Display
Place 3 stick pins  into each side of the brace creating a good strong base for your paper bead display.


IBDCraftLady Paper Bead DisplayIBDCraftLady Paper Bead DisplayIBDCraftLady Paper Bead Display

Now all you have to do is decorate to your liking.Use your imagination to create a paper bead display that will fit into you special crafting space.
 
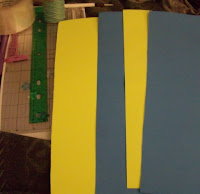
 I used 4 pieces of poster board cut into  5 inches wide by 15 inches in height.
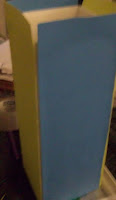
 I just glued one piece of poster board onto each side having enough to 
fold over on the top to give it a nice finished off look.


IBDCraftLady Paper Bead Display

My finished paper bead display I slapped my logo on the front of it and attached my paper bead blanks along with the information I need to be able to create each of the paper beads. This can fill up quickly so you just might want to make two of them. Feel free to share with me how your paper bead display turned out I would love to see them.


IBDCraftLady