Showing posts with label Paper Crafts. Show all posts

Friday, January 6, 2023

Reorganizing my Embrodiery Flosses and Supplies

 I know this will be a big job but it needs to be done. 

First I printed out an Anchor to DMC floss conversion chart whitch I found here at

 Yarn Tree .  

I also created an Excel sheet so i could keep track of all of the dmc colors I have on hand so I dont keep buying repete colors which i seem to do alot :).


As you see my current way of storing my threads and excessories is done in a mixture of diffrent ways that I have discovered over the years trying to  organize them.

 Bobbins

Clothes Pins

Leaving them in there orginal wrapping 

By project

But in the end I just ended up  tossing them all in a bin together creating this beautiful jumbled mess.


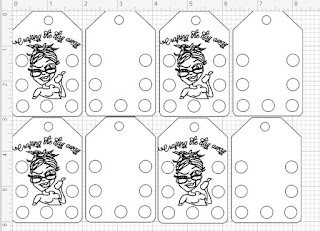
To get started I went into my Cricut Design space and desiging my own CraftyLady Floss Drops. 

This way I will be able see all the colors that I have on hand and get inspired to use them.

Being thrown in that container kept them out of sight out of mind,


I used my cricut to draw out my logo and cut out  the tages I needed. 
I then glued the 2 halves of cardstock together to make them thicker.
Once dry I sealed them with packing tape and used hole punch to repunch all of  the holes out. 
They now had a protective covering and feel like a thin piece of plastic making them more durable.


Made a bunch of drop cards so I am now ready to start moving all of my embroidery threads
 to there new homes.


Now that the flosses are all hung up I organize the rest of the items in the container.

I took small size snack bags and placed card stock in so that they could stand up taking less room in the container and easier to grab when something is needed rather than digging threw container. 
These will holds extra flosses and hang tags.

Other items being stored here are sewing needles , small scissors, a tape measure, sewing kit , hoops and a notebook which I like to have in each of my  different crafting bins to write down insperations for that craft as well as projects thatI am working on. This way if i walk away from a project I will  know what and why I was making the project and any important information needed in order to complete it.


So nice and neat now what a difference a day makes :)


Since it was so neat and orderly on the inside i decided to make all new matching lables for all of my Crafting storage containers.
So now side tracked for a minute as this is now an important step to my organizing project, so off
 the dollar store to pick up 2 rolls of vinyl a teal and a purple to create my new lables . Thinking this will be a simple task on my cricut maker 3. Time to get busy and knock these out so i can move on to the next organizing task.


Tuesday, February 16, 2021

Sometimes you just have to make something

 Woke up around 4am and just had to make something. 

mmmmmmmmmmm What to make?

I could use some new sketch books yeah that's it  going to make this and then go back to sleep.

Grabbed a piece of foamboard  / a roll of painters tape / a bottle of glue / my Tissue papers in / some embroidery floss / a needle / my cutting board / a pin tool / and a stack of paper to fill my book with.

Then I got busy measuring ,cutting gluing, and sewing and in a couple of hours I had these 2 great new books.


This is how they turned out I'm really likening them.


This one was a very easy book that was just held together with some good sturdy string. 


This one was a little bit more time consuming as I kettle stitched all of the signatures together. 
By doing this the book will lay flat no matter what page I'm drawing on.


Have any of you had that late night crafting bug bite? and if so 
What have you created during these late night crafting sessions?


Happy Crafting!!!!


Monday, April 11, 2016

Paper Beads (Tube Beads)

Paper tube beads one of my favorite paper beads to create as there are so many ways to decorate them.  You can never go wrong with  paper tube beads especially when you want to make a collection of beads that will all work together in a jewelry piece. Creating  and using the same colors and patterns on a lot of different sized paper tube beads.

IBDCraftyLady Paper Tube Beads

What you will need
Paper bead roller - If you do not have one here is a DIY to make your own.
Bead hole maker - If you do not have one here is a DIY to make your own.
White glue
Paper
Scissors or paper cutter
Decorating Supplies - These will vary depending on how you choose to decorate your paper beads. 


IBDCraftyLady Paper Tube Beads tools

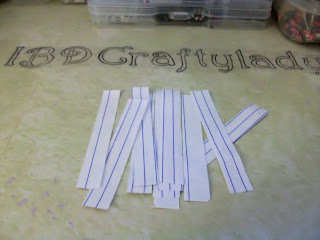
To start making your paper tube beads you will need to cut long rectangular pieces of paper.
See the chart below for the different paper measurements that you will need to cut in order to get the size of paper tube bead that you want to make. This chart represents the sizes the beads will be  if they have been made with the paper from spiral notebooks. If a thinner type of paper is used your paper beads will be smaller in width, and if you use a thicker or heavier paper your paper beads will have a larger width.

IBDCraftyLady Paper Tube Beads Chart

Once you have all of the paper strips cut, you will now have to decide how you are going to decorate these paper beads as some types of decorating needs to be done before you roll your paper beads.


IBDCraftyLady Paper  Beads Tip 1

IBDCraftyLady Paper Tube BeadsIBDCraftyLady Paper Tube Beads

To prepare the inside bottoms of your papers before you roll them. You will want to paint or color the bottom 1/2 inch of the paper so that when the bead is rolled it does not show the white paper in the hole of your bead.This will give it a nice added finish to your paper beads.

IBDCraftyLady Paper Tube Beads

This picture shows you the difference in the appearance of your paper beads if you do not color that bottom 1/2 inch of each paper strip before rolling your paper beads.

IBDCraftyLady Paper Tube Beads


For the purpose of showing you all of the steps to actually form the Paper Tube Beads I will be making  silver paper bead blanks.  So let's get started!

IBDCraftyLady Paper Tube Beads
 Cut your strips of paper to the size you want to make these are 1/2 inch by 3 inches.

IBDCraftyLady Paper Tube Beads
Prepare the bottoms of all your paper strips. If your paper is white and you are making white paper bead blanks you can skip this step.

IBDCraftyLady Paper Tube Beads
Place your paper strip into your bead roller with the colored end facing you.

IBDCraftyLady Paper Tube Beads
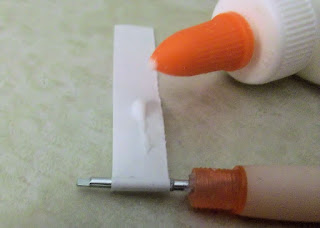
Once you have rolled the colored part of your paper add a light coating of glue all over the remaining part of the paper. I prefer to glue all of the paper instead of just the ends this makes the bead stronger and you do not end up having it unravel on you .

IBDCraftyLady Paper Tube Beads
Keep the paper strip aligned as you roll it to make a nice even bead.

IBDCraftyLady Paper Tube Beads
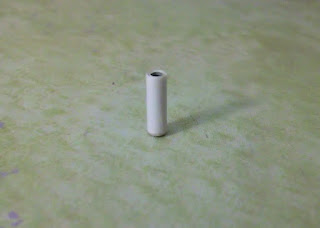
Then you have finished making the paper bead,  hold the bead in place on the roller and give it a little twist in the opposite direction that you had rolled it this will loosen up the piece of the paper that was place in the bead roller making it release off the roller easier.

IBDCraftyLady Paper Tube Beads
Use your bead hole maker, place the bead you just made onto the bead hole maker and roll it across your finger. this will make a clean hole with no extra paper blocking it.

IBDCraftyLady Paper Tube Beads
To make sure both ends are flat stand your paper bead upright an press it down on a flat surface.

IBDCraftyLady Paper Tube Beads
String up your paper beads on to a piece of fishing line.  

IBDCraftyLady Paper Tube Beads
On the end of each piece of fishing line place a few beads these beads will give the glaze a place to settel and it will not ruin your last paper bead that would otherwise be there.

IBDCraftyLady Paper Tube BeadsIBDCraftyLady Paper Tube Beads
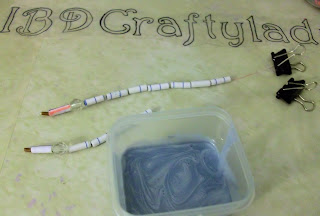
Place some glaze into a small container and add some paint to make the glaze the color that you want it. I am using a metallic silver, mix well. I got these great little square containers at the dollar store in a pack of 12. they are the perfect size for me.


IBDCraftyLady Paper Tube Beads
Dip your string of paper beads into the glaze let soak 20+ seconds giving the glaze time to soak in. 

IBDCraftyLady Paper Tube Beads
Let some of the extra glaze drip off this will leave you with less of a mess on your glazing rack.


IBDCraftyLady Paper Tube Beads
Hang your string of paper tube beads to dry.


IBDCraftyLady Paper Tube BeadsIBDCraftyLady Paper Tube Beads

After 4 dips into the silver glaze they are done.

Use your bead hole maker one more time to clear out any excess glaze from the holes.They are now ready to use just like this or you can decorate them further.

During the next few weeks I will be showing you different ways of how to decorate your paper tube beads.

IBDCraftyLady


Monday, April 4, 2016

Paper Bead Display

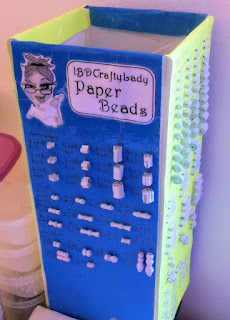
IBDCraftLady Paper Bead Display
 This paper bead display is what I use to keep track of the paper beads I make most often. This way when I want to make some of a certain type of paper bead all I have to do is find the bead on the display and it will tell me what I will need to duplicate the bead. I use to keep a notebook with all of the instructions to make the paper beads . But I found that seeing the actual bead instead of a drawing of it made it a lot easier to decide what size I would really need. So this was my solution for that I hope you find this  as a useful tool in your paper bead making supplies as I do.

What You Will Need To Create This Project
1 Piece of foam board
6 stick pins
Packing Tape
Exacto Knife
Some poster board or other paper to decorate the sides


IBDCraftLady Paper Bead Display
 Start off by cutting your piece of foam board in half


IBDCraftLady Paper Bead Display
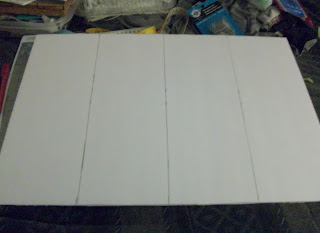
Using one half of this foam board which should now be 20 inches wide by 14 inches in height. You want to draw 3 lines 5 inches apart so that you will  have 4 equal sections. Using the exacto knife score threw only the top layer of the foam board so that the board can be bent but not cut into pieces
.

IBDCraftLady Paper Bead Display
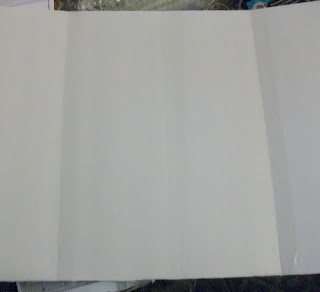
Fold your piece of foam board into a box shape so that you can see the creases on the  opposite side . lay board flat again and now use the packing tape. Place a strip of the packing tape along each crease to strengthen these areas so that they will not tear apart in the future.


IBDCraftLady Paper Bead Display
Now place the foam board back into your square shape and use another piece of packing tape to attach the last 2 end sides together.


IBDCraftLady Paper Bead Display
Cut a small piece of foam board 1.5 inches wide by 5 inches in length. Tape this piece into place as shown above. Creating a brace in the inside bottom of your paper bead display.


IBDCraftLady Paper Bead Display
Place 3 stick pins  into each side of the brace creating a good strong base for your paper bead display.


IBDCraftLady Paper Bead DisplayIBDCraftLady Paper Bead DisplayIBDCraftLady Paper Bead Display

Now all you have to do is decorate to your liking.Use your imagination to create a paper bead display that will fit into you special crafting space.
 
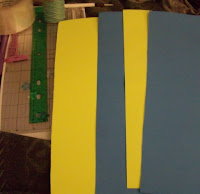
 I used 4 pieces of poster board cut into  5 inches wide by 15 inches in height.
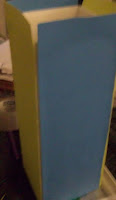
 I just glued one piece of poster board onto each side having enough to 
fold over on the top to give it a nice finished off look.


IBDCraftLady Paper Bead Display

My finished paper bead display I slapped my logo on the front of it and attached my paper bead blanks along with the information I need to be able to create each of the paper beads. This can fill up quickly so you just might want to make two of them. Feel free to share with me how your paper bead display turned out I would love to see them.

IBDCraftLady