

I just love it
when you can take something that is totally useless and heading for the trash, and
find a way to turn it into something useful and beautiful! Which has lead me to
the first new craft I will be learning this year, Paper Making. I have seen plenty of youtube
videos showing how easy it is to make paper so let's give it a shot.
Since there was not one that contained all of the information needed I also
went to the library and did some further research. Before you read on also
check out the crafty terms section so that you are familiar with them as they will be
used in these instructions.
Since I am new
to paper making spending the least amount of money possible was my main
priority. Learning the dip method of paper making seemed the cheapest way to go
so that is where I am starting.
Supplies/Tools needed :
*An old blender
* Vat
* Mold N Deckle: I used 6 molds and 1 deckle(1 mold for
each piece of paper out of the batch that was creating
*Couching
Sheets: For this I purchased
non fusible pellon from JoAnne's fabric store which was $5.99 a yard
*Cover Screen: A piece of plastic or nylon screening the same size as the
hand mold placed on top after paper is formed to remove excess water.
*Sponge : Any
kind will work fine to help remove the excess water.
*Scrap Paper: To make your pulp
*Notes of paper
types*
Colored paper: Most of these dyes are very strong and pass on bright
hues while others will add a soft tint.
Construction paper:
A little of this goes a long way especially when you want to make your papers a
certain color.
Copy paper: Always a good choice when you do not have enough scrap
paper at the time, and a great way to lighten up one of the colored papers
shade.
Envelopes: Most envelopes have long fibers that will help
strengthen your homemade papers.
Gift wrap - This makes a great base for homemade paper. Not to
mention the great metallic's that can
give your papers that bit of glitz
Junk mail:- Always a good choice, it comes in a multitude of colors and
everyone seems to have it.
Magazines: The inks on the glossy paper tend make the pulp gummy.
But I find it very useful for making inclusions
to add to my papers.
Newspaper - Does not make the best homemade papers, if a gray pulp is what you want give it a try then
compare your papers made from other sources.
Step 1: Making your mold and
deckle
To make the mold and deckles I went to the dollar store and
picked up a bunch of photo frames, and used some old window screening that I
had left over from redoing the screen porch door a while back.
You will need 1 frame
for your deckle part and 1 frame
for each mold you will be making.
I have tried a lot of different methods for paper making that I have found all
over the internet and they all seem to make quite a
mess. So the way I do it is a bit different, as I have found it a lot easier to
make my papers by leaving the wet pulp
on the mold until it has dried. So when I make my papers I have 6 molds for 1
deckle. Doing it this way for me was way less messy, a press was not needed, and wet papers did not need to be transferred to dry felts and stacked to dry evenly.


Cut screening an inch larger than your frame on all sides.

Hot glue the screening onto the photo frame so that it is
tight.

This mold and deckle was made from a double photo frame to make 2 smaller pieces of paper at the same time.
Step 2: Create your
pulp
Creating the pulp is quite simple
just gather up all your old scrap papers, flyers, newspapers, old mail, wrapping paper, any kind of paper will do. I separated
the colors so I could somewhat figure out what colors I would end up with when
I used or mixed them.(as you see in the image below mine are kept in the storage containers that I made a few years
back in a Water Bottle Challenge )

The smaller you cut
your pulp papers the shorter amount of time you will have to let them soak
before you can blend them. I would suggest that your pieces be no larger than
1 inch squares. This also makes it less likely that you will burn out your
blenders motor.

let paper pieces soak anywhere between 1 hour up to over
night the longer the paper pieces soak the more they break down allowing them
to blend easier.
 The papers I made in this tutorial were all made using the labels off of water bottles
If you want to use your paper to write or paint on, you can blend in a tablespoon or so of white glue, corn starch, or gelatin (dissolved in hot water), or 2 teaspoons of liquid starch. These additives, which are called "sizing," make the paper less porous to ink and paint.
Blend the paper pieces for 40-60 seconds to get a nice pulp.

If you will be
adding inclusions to your paper, here is where you would add the inclusions into the blender and mix
another 1-2 seconds or you can add them right into the vat before you dip your
mold.
Step 3: Fill your vat
Fill your vat with 2 to 6
inches of water. The goal is to have your pulp in a sort of watery suspension
so that it can be evenly spread onto your mold. A good ratio for your vat is
about one blender full of pulp for every two inches of water.
As the amount of pulp in the water will determine the thickness
of your papers, you may want to play with different ratios once you see how your
finished sheets of paper have turned out. Keep track of what pulps you have
used, the amounts used , as well as any inclusions you have used, so that you
can reproduce the same papers again.

Step 4:Time to
Dip
Give your slurry a good mix with your fingers to get it all
floating. Now gently lower the mold and deckle at an angle, screen side up,
into the tub starting with one edge and slide it to a horizontal position near
the bottom. Gently shake the mold and deckle side to side. Now quickly lift the
mold and deckle straight up, allowing fibers to coat the mold and to allow the excess water
to drain through the bottom and back into your vat.


Step 5: Removing
excess water.
Now that you have your
pulp on the mold remove the deckle and place a loose piece of screening over
the top of your pulp. Place these two on top of one of your felts.


Using a sponge gently remove some of the excess water from your paper .

Flip your mold over and continue to remove all of the excess water out that you can.
Once your felt is to wet to absorb any more water place a new one down.

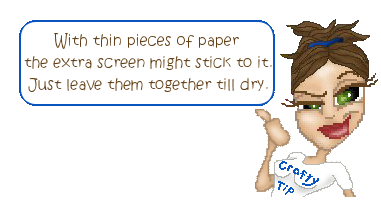
Remove the top piece of extra screening and set your molds somewhere warm to dry.
I lined mine up in front of a heating vent since its winter here in Wisconsin
and that is the warmest place in the house.

You can also stack them to dry.

Step 6: Your
finished paper.
When your paper is
completely dry simply peel it off of the screen. You are now ready to use your
new home made papers in your crafts.


I get between (4-6) 6x8 pieces of paper per cup of paper.
This project cost me
$5.99 for the pellon
$9.00 for the frames
$0 for window screening that I had laying around
$0 for the vat that I had laying around
$0 old blender that I had laying around
$0 for the sponge that I had laying around
$0 for the scrap paper I used the labels off of water bottles
Total of $14.99
And from now on all the paper i make will cost $0 you can not go wrong with that price for a crafting supply!!!

If you have found this useful you will want to check out these other links.
No comments:
Post a Comment