

This glazing rack is
9 inches tall
After all of my testing of different types of glazing and or drying racks over the years, I
sat down and decided what was needed
most and what would help me to be more efficient while making my paper beads.
This is the rack I finally came up with and best fill all of my paper bead
making needs.
What you will need to
Make a 14 inch tall glazing rack

1 pieces of foam-board
or 2 pieces of foam board 1 black and 1 white if you want it two toned
like the ones I have made here. I just used scraps of what I had and sized it
to my needs.
A pack of stick pins
A bottle of glue
5 chop sticks / 5
thin dowels, or 5 long skewers
I used the packs of chop sticks that come when we order
Chinese food as no one but me knows how to use them, so I had a lot of extra
ones in my home. You could also use thin
dowels cut into 8-9 inch lengths or even
the bamboo skewers used for cooking.
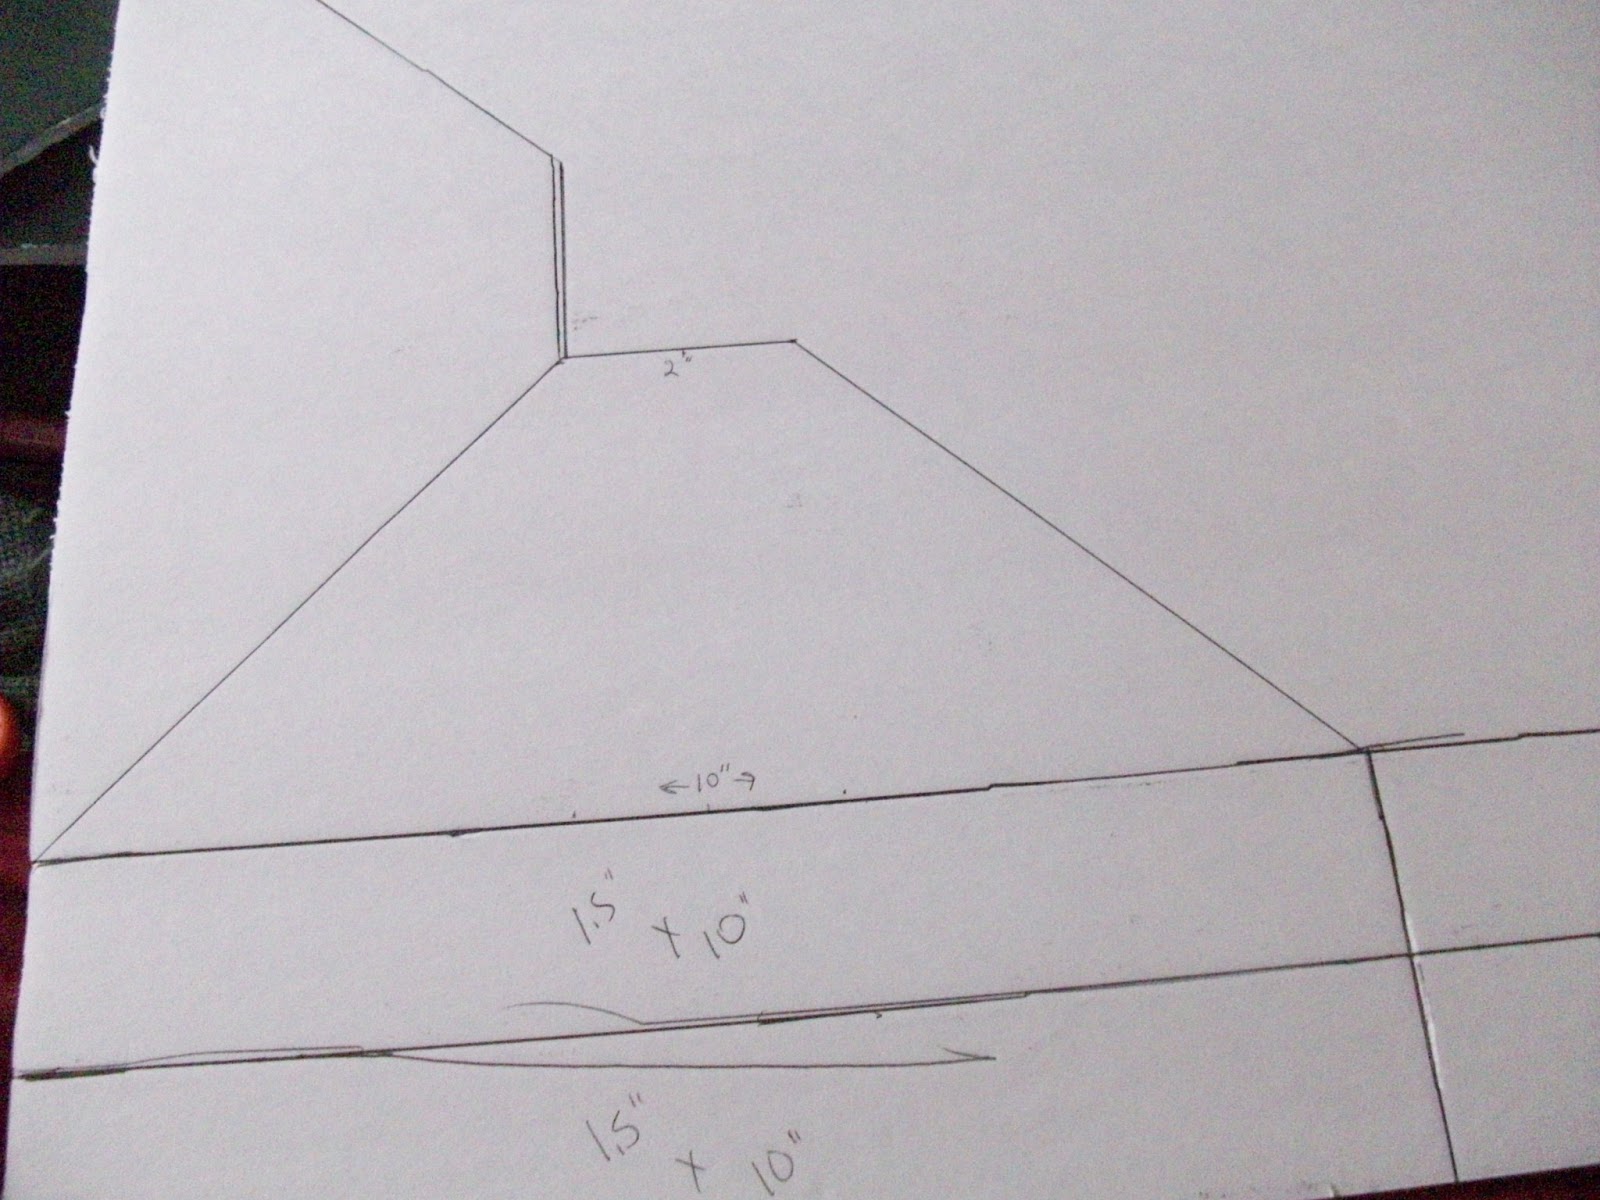
Out of the Black foam
board you will need two rectangle pieces
1 piece cut to 10
inches in width by 12 inches in height (Piece
A)
1 piece cut to 10
inches in width by 14 inches in height.(Piece B) This piece determines the
height of you glazing rack. If you want to make the shorter rack the dimensions for this piece would be 10 inches in width by 9 inches in height. I
would not go any shorter than 9 inches but you can go as high as you would like
as long as it is still stable while it is standing alone.
The dimensions for
the side and top supports are as follows, and they are also pictured above.
2 rectangle pieces of
foam board cut into 1.5 inches in width
and 10 inches in length(Piece C)
2 Triangle
pieces that have a 10 inch bottom and a 2 inch flat top instead of a point. (Piece D)
Now how to put it all
together

Bottom of the board Top of the board
You start off with Piece A Draw a line threw the
center of this piece so that you have 6 inches on each side of the line . You
will then place stick pins threw the foam board
all along the line


Place Piece B so that
the stick pins are going into the foam part on the bottom of Piece B.
Add glue before
pushing it all the way to the bottom . You will also want to check the bottom
of Piece A to make sure all of the stick pins are in all of the way. When done
it should look like the pictures above
from the front and side views.

On Piece D find the center and draw a line.
Use this line to
center the upright part of your rack.(or piece B)
Add glue to the areas
of your bottom part of your rack (Piece A) and the upright part of your rack.
(Piece B) that will be touching Piece D. Put Piece D in position and attach with stick pins, as pictured above.
Repeat these steps on the other side of the glazing rack with your second Piece
D. You should now have a rack that looks something like the picture below.

(Sorry about the mess
in these pictures as I had just moved and had nowhere to craft. but I had this
idea and had to make it right then and there . Proof this is quick and easy to
make in no space lol)

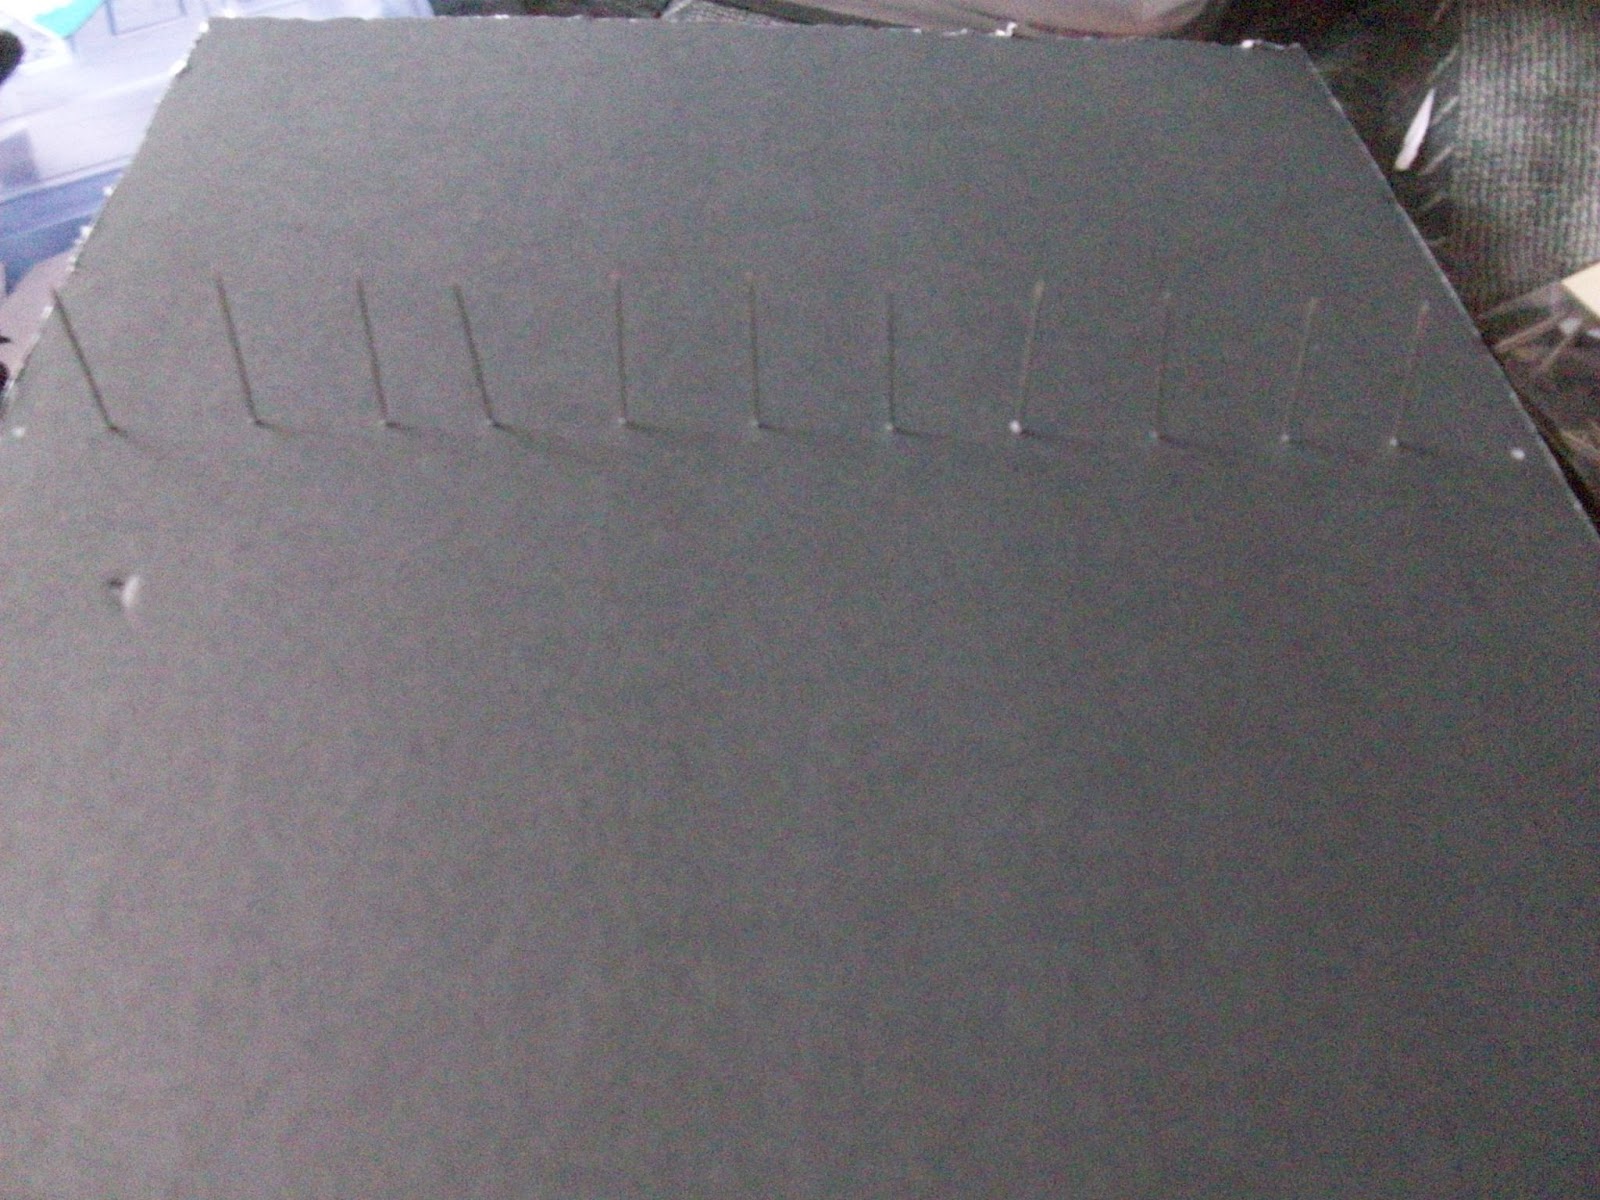
For the top Brace
Place the 2 Piece C foam boards together
and poke holes threw them using the chop stick. placing the first hole 1 inch
from the end the 3 inches apart until you have 5 holes.

Glue 1 of Piece C to
the top of your rack once dry start at one end placing your chopsticks threw
each hole. Now place your other Piece C onto the chop sticks on the other side
, adding glue to attach your foam board and to hold all of your
chopsticks in place.
Again sorry there
were not more detailed picture of each step in the making of this glazing rack,
but at the time it was just a whim project that I ended up whipping together
because I could not find what was needed, and I never expected to be doing a
DIY on paper bead glazing racks at the time.

Thank you, neat idea!
ReplyDelete