Showing posts with label D&D. Show all posts

Friday, September 17, 2021

Skull Dice Tower

 I found this supportless skull design dice tower on thingyverse today so will be playing with my 3d printer to see how it works for me. Sometimes it prints perfect other times a big mess so hoping for the best. This skull can have a spider on top  or just plain going without the spider. Very nervous  I have never printed anything out this big before said it will take 2 days and 12 hours to complete. Fingers crossed will let ya know how it printed out.😜

Skull dice tower


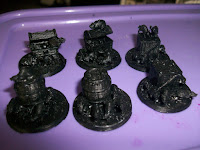
Today I will also be painting some rat miniatures  that I printed out earlier links below

These printed out quickly and perfecty. I also added some of the zombie rats I cut off of the other prints so they would not all look the same.

Giant Rat


These also printed out nicely  had a few mistakes printing but  just adjusted them to look good by cutting off some of the rats so they could be placed differently. This worked out great in the end as now they all looked different from each other. 

Zombie Ratz


If you have a 3d printer does it always print perfectly for you ?

Wednesday, August 4, 2021

D&D Hit Point Trackers

 Wanted to make Something to help my players keep track of their hit points during fights

  so I came up with these trackers so easy to make and use during the games.

All that is needed is some foam board and a old cereal box and a tooth pick 

to make the bases of these trackers.


Start off with a piece of cereal board that is 3 1/2 inches by 2 inches to make a template for your bases.
 I just ran a line threw the center of it lengthwise and came in an inch on each side and added the squares were the numbers can then be seen. 
Then added 2 holes with a small punch for where the pieces will be added to hold it together.

Now use this template to cut out the foam board pieces that will be needed
1 with the squares cut out and 1 without the squares cut out.


Cut 1/2 inch pieces of a tooth pick and glue them into the bottom piece of your base.


Cut out two 2inch circles out of the cereal box
print out dials and place on top or make your own.


Place holes in center of your number disks and place on toothpicks


Place top base on and this is how it all goes together.


But who just wants this plain mess to track their hit points i know my players wouldn't want that so I get busy taking them all apart and decorating them to fit each players game play.

Here is how I did 1 of them


I stained the front and back pieces black and added a gold trim around the disks. I also added packing tape over them for added strength and so that they would turn more easily.


Scratched in some wood grain and plank lines to look like wood then painted.


Coffee stained some paper to make a scroll  used tooth picks to make the scroll handles 

and used some jewelry spacer for the decorative handles.


Attach scroll to top wood piece cut out the holes foe the number and put it all together.


Here are all of the designs I came up with for my adventures

Scroll laying on stone ground

Open chest full of gems

Stone ground covered in skeleton pieces

A pagan altar

A scroll on wood with a feather quill

a open chest full  of gold and scrolls

Bards instruments and music sheets laying on wood floor

and finally a plain wooden floor 

still not sure what i want to do to to this  one .


I hope you find this easy to follow and come up with some great trackers of your own.

Would love to see what you come up with!!!


Painted D&D Tile Blanks


I finally had the time to paint all of the Double sided D&D tile blanks I had created months ago.
Here is how They turned out so glad to be getting back to my creative self.
Now time to get back to my self brew and writing the stories these tile can be used in :)


Friday, December 4, 2020

Double sided Dungeon Tile Designs


Now that you have your Tile Blanks what do you do with them?

Well it is time to get busy designing how your sets will look!

I got out my box of foam board scraps and started playing. Usually when creating a new set I have a certain purpose in mind like a cobblestone floor or a cave floor, that would be needed in an upcoming game, but this time it is different I am just creating them to add to my stash of game resources.


Here are the 4 double sided tiles I will be making over the next couple of months


Side 1
Side 2


Here is the 1st tile set sides to give you an example of how the others were created .
Have fun playing with patterns to see what you can come up with :)


For Side 1

This pattern will take (32) ½ x ¼ of an inch pieces of foam board 16 of which will need to be cut in half, and then place them in a similar pattern using white glue to cover the top of the tile blank.


For side 2

This Pattern will take 13-14 pieces of ½ X ¾ of inch pieces of foam board using white glue place them in a similar fashion.


Tuesday, December 1, 2020

D&D Double sided dungeon tiles


Since Covid is going on and we cannot get together to play D&D right now I figured it was a good time to create some new game tiles to be used in the game. The way I see it you can never have enough different tile sets and other area scatter for your game. There is no better way to help immerse your players into the world you have created.

I have showed you some single sided tiles I have created  this is a more detailed explanation of the process of making these tile sets.

 So I have designed 8 new tile sets, but this time I am making them double sided, to help save on space in storage.

Warring: These tiles take a lot of tiny pieces and constant repetitive steps so if you get frustrated quickly this might not be a project for you to take on. They are not something you can whip up in an hour or two.

The Base of the Tiles

If you will be making a lot of different sets or you want blank bases on hand just go to town and create them in bulk so when you’re ready to create a new set the bases they are already done. Then all you have to do is embellish them to your liking.

When you get to the point where your painting your sets, try to paint the whole set at the same time so that you will not have to try and color match them later.

Materials I Used

Dollar tree foam board

To help you estimate how much foam board you will need for your set. You will get 96 (2.5 X 2.5 inch squares) out of 1 piece of foam board which will create 48 full size base tile blanks )

Cereal box

How to Make the base

I will be using 1 piece of foam board to create 40 full size tiles and 16 half size tiles for each of my sets.

I found the best way to cut the foam board into the tiles is to

1.       Cut foam board into 3 sections each 10inchs wide.

2.       Using my cutting board to slice each section into 2 ½ inch slices

3.       Cutting the 2 ½ inch slices into 2 ½ X 2 ½ inch squares

4.        Finished 2 ½  X 2 ½  squares


Now you will need to cut up pieces of cardboard into ¾ X ¾ inch squares you will need 20 of these for each tile.

Putting it together

For each whole tile you will need

(2) 2 ½ X 2 ½ inch squares of foam board pieces

(20) ¾ X ¾ inch squares of cardboard

Glue the cardboard squares together in groups of 4


For 2 half square tiles you will need

(2) 2 ½ X 2 ½ inch squares of foam board pieces cut in half

(20) ¾ X ¾ inch squares of cardboard  12 of them cut in half

Glue the cardboard squares together. (8 )solid squares in two groups of 4 (24) half squares glued together in six groups of 4.


Parts once cardboard parts glued together


Remove paper from one side and place glued cardboard parts onto foam board like this


Glue the blank tiles on top of pieces with cardboard pieces.

Just like a sandwich :)


You now have finished blank pieces for future use


You will also want to make tabs to hold them all together to make one of these tabs

Cut 3 pieces of cardboard into 1 ¾ inch long buy ¾ inch wide pieces

Glue them together

Cut corners on angle to get the following shape


Wednesday, November 6, 2019

D&D Items Created So far


All of these items were made out of foam-board
Textured and painted
If other items were used it will say.

Mine Carts
pony beads for wheels

Doors & Sewer Grates
3d printer scrap for sewer grate

Weapon Racks & Armor Stands
toothpicks for weapon handles and arms
Cardboard for weapon and shield

Archery Range Targets
Toothpick for arms

Portals,Trash & Nests
Plastic container lid & hot glue for portals
cardboard for trash
3d printer scraps for nests

Cages
Toothpicks for bars

Fire Pits
Cardboard for base
Hot glue for flames

Chests & Treasure Piles
Cardboard for chests & weapon
Paper for trim and scrolls
Large glitter for gold

Logs

Stone Formations 

Ancient Stone Alters

Fountains
Hot glue for water

Portal

Gate Entrance
Toothpicks to make gate usable

Rune Puzzle
toothpick and bead to hold in place and make it so it can turn

Shelves
Jars pony beads
jar lids foam-board

Bookcases
Books foam-board covered in construction paper

Boarded up Entrance

Alchemy Table
Jars  beads 
Jar tops earring backs

Desks & Chairs
Books foam-board covered in construction paper
Scrolls paper
ink well bead
feather wire and paper

Table

Beds
Bead posts beads
Blankets paper towel