Showing posts with label Holiday. Show all posts

Monday, February 1, 2021

Valentines Heart set


Here is a quick little set to make for yourself  our someone else special to you for Valentines Day .


Supplies

Thread

Seed beads your choice of color

Bugle beads your choice of color

Jump Rings

Thin jewelry wire

Clasps

Ear wires

A pair of Jewelry Pliers


This set is very easy to make and can be finished in a couple of hours, depending on your beading skills. But do not worry even a complete beading beginner can  do this.


The main pieces to bead will be the hearts and here is a step by step to show you how to make them.


Your piece should now look like this.


Your piece should now look like this.


Your piece should now look like this.


Your piece should now look like this before you flip it


Your piece should now look like with the last bead still needing to be added


Once all these steps are completed trim off excess thread and your heart is finished.


To Create Earrings

You will need to make 6 hearts. 3 for each earring
6 jump rings
1 pair of ear wires

Just use the jump rings to connect the hearts together and attach to the ear wires.


To Create Necklace

You will need to make 3 Hearts
4 Jump rings
Thin wire
seed & bugle beads

Connect hearts using jump rings, adding a jump ring on the outside of the hearts to  so you can connect the chain you will make.( you can use ready made chain you do not have to make your own links)

To make links

Using wire make a small loop wrap to close loop cut off excess wire.
Add 1 seed bead   1 bugle bead   and 1 seed bead
Make a loop at other end wrap to seal and trim off extra wire.

(Make sure to check for sharp ends you do not want to get poked while wearing your necklace.)

Now just keep adding links till you get the length you want. Repeat this for the other side as well.
then add your clasp and your Necklace is done.


To Create the Bracelet

See how many hearts will be needed to go across the top and sides  of your wrist. In my case it was 7.

Make 7 hearts
9 Jump rings
Make 7 beaded links
Make a string seed beads a little longer than your wire beaded  chain

Connect hearts with the jump rings with an extra jump ring on each end.
to one connect 1 end of your wire chain link and beaded string.
at the other end of your wire beaded chain and beaded string add another jump ring
and your clasp. your bracelet is now finished.


Happy Crafting


Friday, October 18, 2019

Christmas Cookie Awards 2018 Decorations


Movie Posters


Materials:       Paper              Cardboard box            Pencil              Paints

 Not really a how to more just showing what I did

I created frames from cardboard boxes 
Cutting out 2 rectangles the same size. 
One of the rectangles cutting out the center to make a 1 ½  inch wide frame. 
Then line the inside of the cutout with ¼ inch strips of card stock, and painted the frame silver.


I was just going to print out some Christmas movie Photos But i wanted them larger so i got out one of my large sketch books and began to draw them instead.
Here are some while they were in progress.


When finished i added them to a frame


Now The finished posters I had a few more but guess I didn’t take pictures of them all.


The Clapboards


Foam board cut into 2 pieces to form the clapboard then trimmed with ¼ inch pieces of cardstock and painted
A piece of thin cardboard (old cereal box ) cut into a rounder triangle and painted silver to make the hinge 
Also added a section onto the back to hold the recipe cards.


Red Carpets

Wrapping paper cut in long strips given a tapered edge on one end then tissue paper used to decorate along the sides and a small ornament added to the tip.


Paparazzi Elves

Found these adorable elf online made templates traced onto poster board painted them black
Stuck into a square piece of foam board and trimmed with a metallic pipe cleaner.


And a marquee with just 1 piece of foam board paint and a small set of lights poking threw holes.


And here is everything put together


You can find the tutorials on how to make the different awards In the links below.


Saturday, October 5, 2019

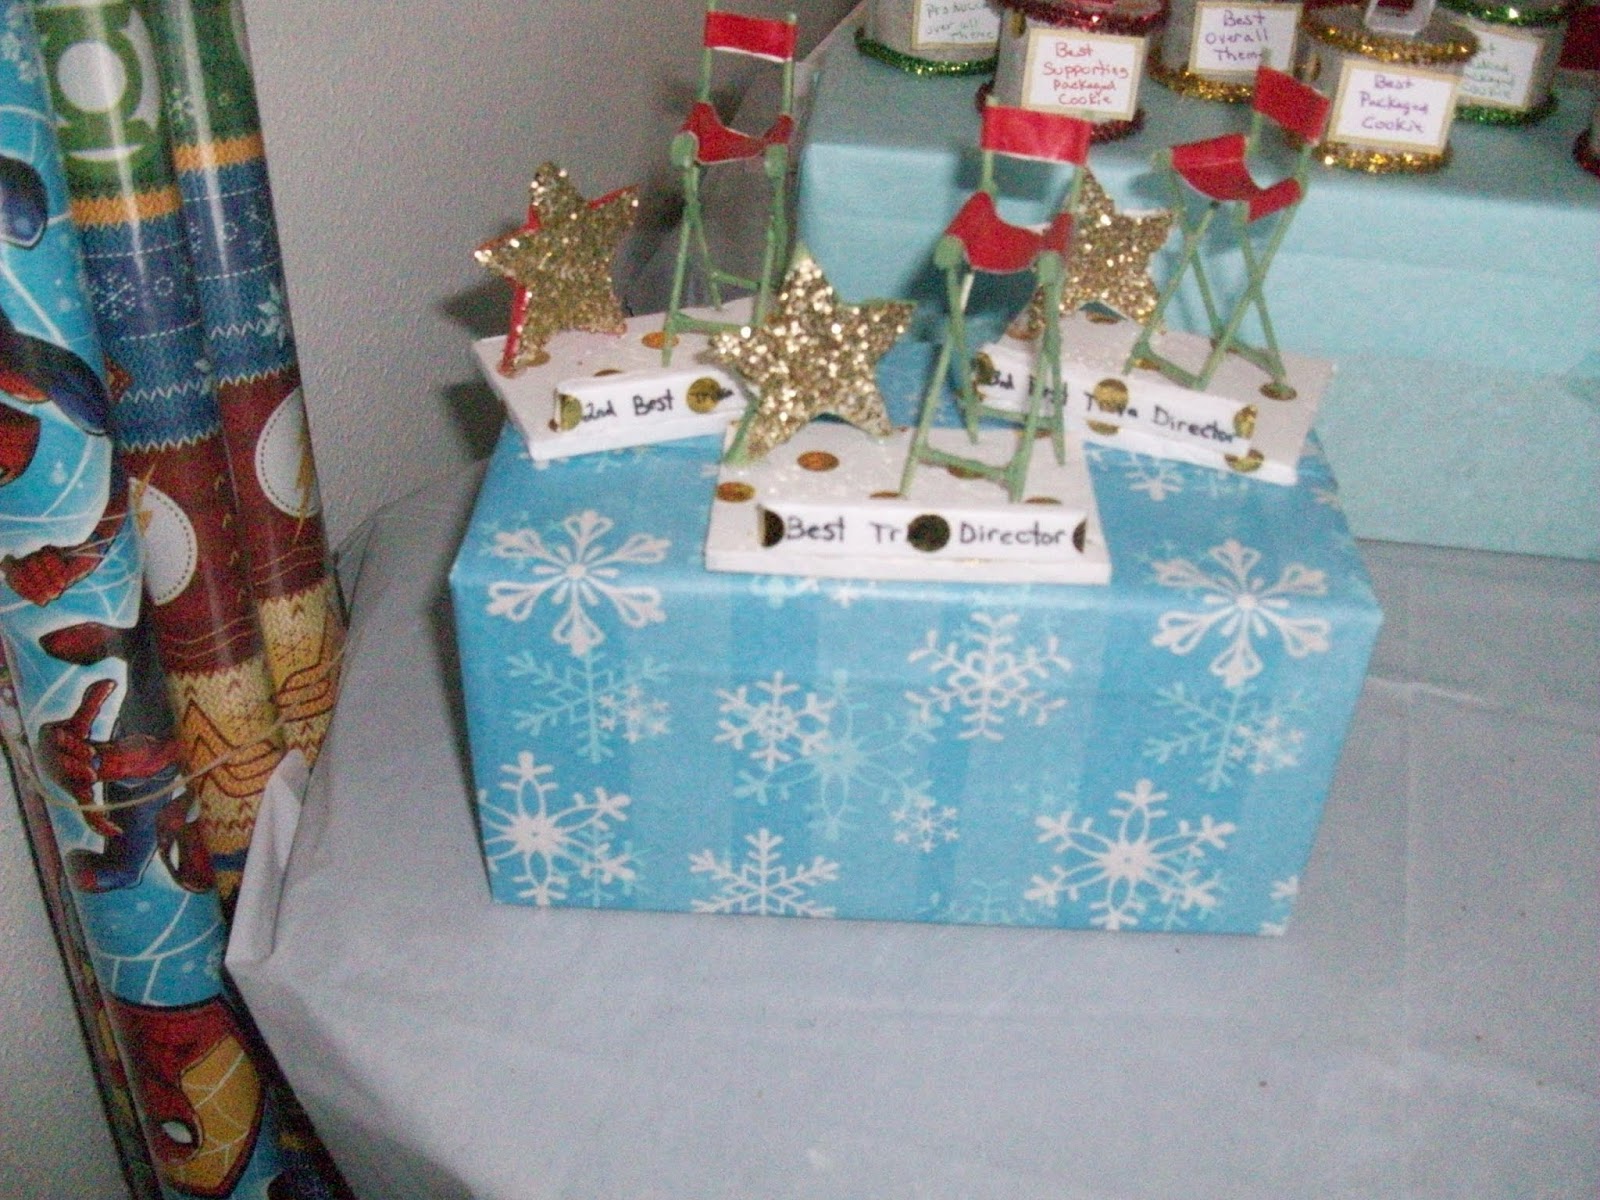
Christmas Cookie Award: Directors Chair Award


 Last Minute I felt I needed 1 more award so i used all the scraps from the other two awards as well as some toothpicks and whipped this 1 together not a very detailed tutorial.

Directors chair award

Materials
  • 6 tooth picks  for each chair         
  • Glitter  
  • Paint    
  • Hot glue
  • Green paint
  • Foam board  scraps     
  • Wrapping paper scraps        


Glue tooth picks together to form a director’s chair 
add 2 small pieces of foam board for the seat 
then paint it green


Cut some pieces of foam board 
1 for the base, 
1 a thinner strip for the plaque 
A star.shape


Cover base and plaque with tissue paper, cover star with glitter


Add strips of wrapping paper to back and seat of chair like in picture. 
Glue all pieces onto base
and you are finished


Here is where you can find the other awards tutorials for the Christmas Awards Cookie Party